Friday, October 26, 2018

How I Painted the Soulsnare Shackles.

Greetings and salutations fellow hobbyist!

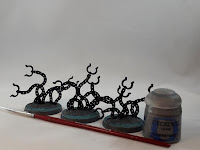
Here is a guide how I painted the Soulsnare Shackles from the Malign Sorcery boxed set.

Step 1.

I started with priming the model black and added Astrogranite with a texture tool from Citadel.
Then I painted over the entire base with Mechanicus Standard Grey, covered the Astrogranite part with Celestra Grey, once the Celestra Grey had dried I mixed Lahmian Medium with Nighthaunt Gloom and applied three coats, followed by a light drybrush of Skink Blue.


I painted the stone with Dawnstone, followed by a drybrush of Administratum Grey and then used a brush with a fine tip to apply some Agrax Earthshade in the recesses.


Step 2.

I painted the chains and clamps with two coats of Leadbelcher while using a Basecoat brush, then tweo more coats of Ironbreaker with a Highlight brush and then a complete wash with Nuln Oil while being careful of pooling.

When the Nuln Oil had dried I re-applied three coats of Ironbreaker while leaving out the recesses and finally a a highlight of Runefang Steel, I focused the highlight on the top of the model as if the light source is  coming from above.


Step 3.

I added some skulls from the Citadel Skulls box and used super glue to attach them to the base.

After all the skulls where in place I applied two coats of Zandri Dust, followed with two coats of Ushabti Bone mixed with some Lahmian Medium and then a careful wash of Agrax Earthshade.

When the Agrax had dried I reapplied Ushabti Bone to the skulls and then a highlight of Screaming Skull with Kolinsky Mastercall from The Army Painter.


Step 4.

I decided to add some rust to the shackles with Light Rust pigment from Forge World and using Pigment Binder to dilute the pigment in a pallet so I can paint it on, you can apply it one with a well used brush if you only want to the rust on the raised areas.


 Step 5.

Finally I added some some lightly coloured tuft to create a little contrast with the base and the model.

Below are pictures of the finished models.


Remember that experience is the only thing that can not be taught.

Thursday, October 18, 2018

How I Painted the Aethervoid Pendulum .

Greetings and salutations fellow hobbyist!

Here is a guide on how I painted the Aethervoid Pendulum from the Malign Sorcery boxed set.

Step 1

I started with priming the model black and then applied several coats of Blackfire Earth with the texture tool.

After the Blackfire Earth dried I used a fair amount of Agrax Earthshade to tone it down. After I applied Tau Orche Light with a drybrush, then followed by a lighter drybrush of Zamesi Desert.


Step 2.

I used Screaming Bell for the Pendulum blade itself, Two coats should be enough. Three coats of Brass Scorpion was applied, followed by a wash of Nuln Oil. Two coats of Brass Scorpion was applied afterwards while being careful of leaving the recesses, finally a highlight of Fulgurite Copper was applied.


Step 3.

For the handle I used two coats of LeadBelcher, two coats of Ironbreaker was added afterwards and then a wash of Nuln Oil was applied while being careful of not getting any on the blade itself.
After the ink had dried I applied two more coats of Ironbreaker and then highlighting with Runefang Steel.


Step 4.

For the upper part of the handle I applied two coats of Balthasar Gold and washed over it with Agrax Earthshade. I used Gehenna's Gold as a highlight and a little Runelord Brass as a final highlight, you can skip this last colour though.


I used Stormhost Silver on the runes of the blade, used Ironbreaker and Brass Scorpion on the rivets to make them stick out a bit more.


Step 5.

While painting the flame itself I put some nitrile gloves so I will not be rubbing the paint off, friction, sweat and models do not go well together.


I started with three coats of Celestra Grey for the flame, followed with three coats of Ulthan Grey.

Painting the Bloodletter Glaze takes some time, I started with applying a single coat on one side while holding the model and leaving it in a horizontal position while it dried, then repeated on the other side. I think I used around four coats on either side.

After the Bloodletter was applied I used Evil Sunz Scarlet as a highlight and Troll Slayer Orange as a extreme highlight, I ended up drying brushing it on rather than using the brush I originally intended to use.


Step 6.

I took some skulls from the Citadel Skull box and used super glue to attach them to the base.

I applied two coats of Zandri Dust on the skulls, followed with three coats of Ushabti Bone and then a careful wash of Agrax Earthshade. When the ink was dry I re-applied Ushabti Bone while being careful around the recesses and a highlight of Screaming Skull was applied to bring the raised area out.


Step 7.

As an after thought I used Carroburg Crimson to darken the recesses of the "flame" to give it more depth.

I went two rounds of Blood for the Blood God on the base to make some pools of blood to compliment the flame.


Here are pictures of the finished model.


Remember that experience is the only thing that can not be taught.