Here is a guide how I painted the Trove of Arcane glory from the Shattered Dominion Boxed Set.
Step 1.
After putting the model together I made a MDF base and added some plasticard on top of it to have a floor to work with.
 |
| The Trove on its new base. |
 |
| A drill, drill bits and rivets from Zinge Industries |
 |
| All rivets have been added. |
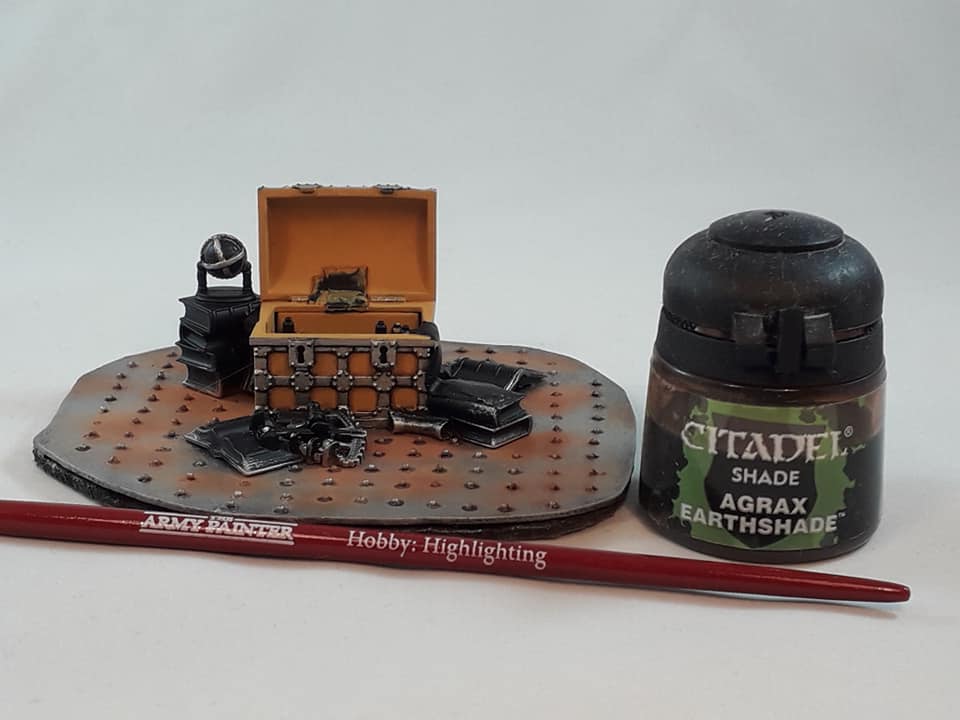
I started painting the floor with 2 coats Leadbelcher, followed with 2-3 coats Ironbreaker and a wash of Nuln Oil.
When the Nuln Oil has dried I reapplied Ironbreaker and applied a dry brush of Runefang Steel then picked out all the rivets with Brass Scorpion.
To make the floor a bit older, I stapled it with Aged Rust pigment from Forge World and added a little pigment binder afterwards to keep it in place.


Step 3.
For the panels I went for yellow. Starting with Averland Sunset, about 2 coats for a even surface. I used Seraphim Sepia for a recess shade and a highlight of Yriel Yellow.


Step 4.
For the scrolls and pages of the books I started with a base coat of Rakarath Flesh and couple of layers of Pallid Witch Flesh, you can choose between a recess shading or a complete wash with Agrax Earthshade, just be careful with the shade pooling. Afterwards I reapplied Pallid Witch Flesh as I opted for a complete wash, I drybrushed the pages of the books for a easier time. Scar White was used for the highlight of the scrolls.
I also picked Abaddon Black for add some decorations on the scroll and I decided at the last minute to use Mephiston Red to add red text to the scroll, like someone used human blood to write.


For the book covers I applied 2 coats of XV-88, 3 coats of Tau Light Orche and a highlight of Ugnor Flesh.


For the trim and decorations on the books I went for a gold colour. I started with 2 coats of Balthasar Gold, 2 coats of Gehenna's Gold and a careful wash Reikflesh Shade (Gloss), then used Gehenna's Gold again and finally Auric Armour Gold for a little highlight.


Step 6.
Next I painted the flask inside the chest.

2 Flasks where coated with Mephiston Red, 2 coats of Evil Sunz Scarlet, a careful wash of Carroburgh Crimson. I used Evil Sunz Scarlet again to brighten up the flask and applying a little highlight with Wild Rider Red.


2 other flask where painted with Thousand Sons Blue as a base coat, then 2 coats Ahriman Blue was added, a careful wash of Drakenhof Nightshade was applied. Ahriman Blue was reapplied and finally a highlight of Hoeth Blue.


The last two flasks where base coated with Caliban Green and I added 2 coats of Warpstone Glow, followed by a Biel-Tan Green shade. When the shade has dried I reapplied Warpstone Glow and then a highlight of Moot Green.


Step 7.
I painted the sextant gold and the stand of the globe that rests on the books. The globe was painted blue.
I started with Retributor Gold, 2 coats of Liberator Gold, a careful wash of Reikland Fleshshade (Gloss) to tone it down and reapplied Liberator Gold to add some shine to it while being careful around the recesses, finally I applied Auric Armour Gold.


I started with Caledor Sky for the globe, washed it with Drakenhof Nightshade, applied 2 thin coats of Caledor Sky and finally a highlight of Alaitoc Blue.


Step 8.
Here are pictures of the completed model.


I'll admit I might be should have used XV88 for the book covers and Nuln Oil on the Gold trims to make the model look less yellow to make the chest itself stand more out.
Remember that experience is the only thing that can not be taught.