Step 1, The Base.
I started with putting some Blackfire Earth with the texture tool, as the it would bring some contrast to the purple I used on the model and the green I used on the rocks.

Step 2, The Skin.
As it goes with Goblins, I went with green. I started with Heavy Green from Vallejo and used the small layer brush from Citadel to pick out the skin on the face, arm and legs. I went over it with Sick Green with the same brush, then washed it Black Green and went over it with Sick Green with Kolinsky Masterclass again while being mindful of the recesses. Finally I used Goblin Green (Air) with the Kolinsky Masterclass paintbrush to pick out the raised areas.


Step 3, The Cloak.
I chose purple for the cloak is that is more a regal than the black one shown on the box art. I started with Royal Purple from Vallejo, washed over it with Violet ink with the medium Glaze brush from Citadel and gave it another coat of Royal Purple. then I added Hexed Lichen as a highlight. Finally I added Warlord Purple with Kolinsky Masterclass brush as a extreme highlight, do note that this colour can be quite thin and will require careful application.


 +
+For the grown, scepter, some minor decorative items and raised area of the base I started with Retributor Gold, gave it a careful wash with medium Glaze brush, applied a careful highlight with Retributor Gold again and then a final edge highlight with the Kolinsky Masterclass brush.


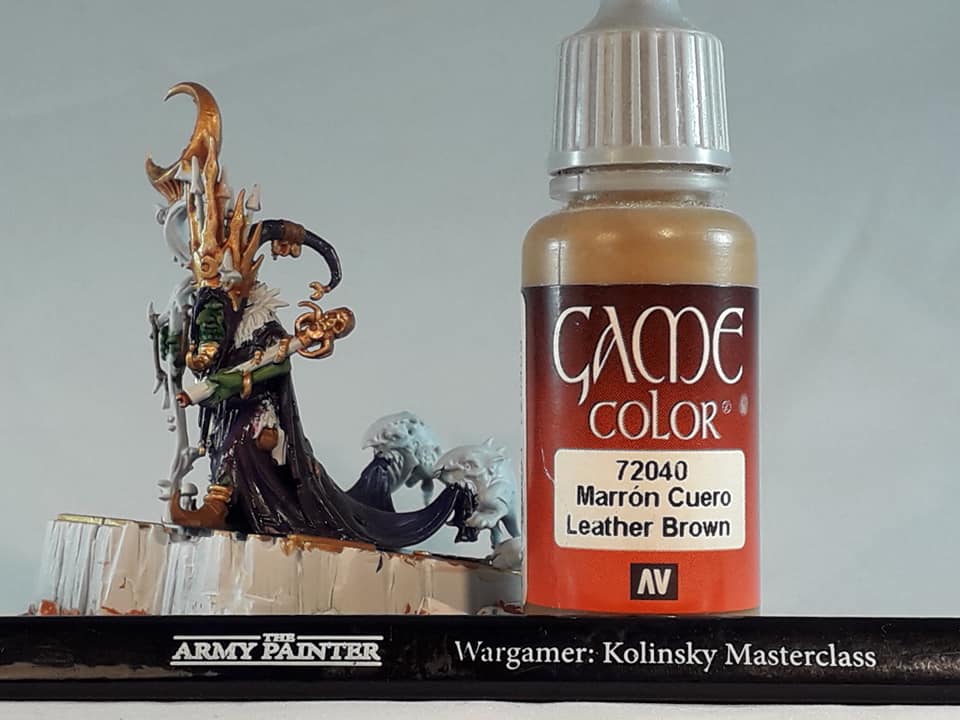
Step 4, Leather,fur and the Staff.
I used Charred Brown on the boots, bands and his pouch, I followed this with Beasty Brown and then Leather Brown, then washed all of it with Mid Brown from The Army Painter.


I went for Doombull Brown for the fur, gave it a generous wash of Agrax Earthshade and carefully drybrushed it with Deathclaw Brown, you might want to use a piece of paper over the painted area so you will not drybrush over the cloak.


Step 5, Skulls and stalks.
I started with applying Zandri Dust on all the skulls on the base and the mushrooms stalks with the Kolinsky Masterclass, a careful wash of Agrax Earthshade was applied and followed with Ushabti Bone, a highlight of Screaming Skull was added last. You can add Ushabti Bone first, then carefully apply Agrax Earthshade around the ends of the mushrooms stalks and painting little Screaming Skull
around the middle.


Step 6, Stone and a few 'shrooms.
I started with covering the entire stone and a few mushrooms with Steagdon Scale Green, while being careful around the Gold details I painted on the stone. I applied Sotek Green over all the stone with a small layer brush, covered it with Coelia Greenshade using a medium glaze brush, Sotek Green was re-applied with the Kolinsky Masterclass while being careful of the recesses and finally I highlighted with Temple Guard Blue.


The mushrooms where painted with Kabalite Green and Sybarite Green with the Kolinsky Masterclass.


As a final touch I applied two coats of Waywatcher Green over the rocks and mushrooms to tie the colour together and give it a more "glowy" look.

I started with Jokaero Orange as a base for the squigs, covered that one with Troll Slayer Orange and washed it Casadora Yellow. When the shade had dried I reapplied Troll Slayer Orange and highlighting with Fire Dragon Bright.


I used Mephiston Red for all the mushroom caps, eyes of the Loonking and Squigs. A wash of Carroburg Crimson was used over all the red, highlighted with Wazdakka Red and used to bring the eyes a little more.


The fungus was painted with Tallarn Sand and washed over with Nuln Oil.


The teeth and claws of the goblin and squigs was painted with Heavy Ochre and was washed over with Seraphim Sepia.


As a final touch I added white dots on the mushroom caps.

I should have painted the model and base separately, as there where some hard to reach places around where the model and base meet.
I really enjoyed painting this model.
I added little Light Earth pigment from Forge World make it a bit more dusty near the base of the rock.
Here are pictures of the finished model.


Remember that experience is the only thing that can not be taught.