I finally completed this one!
Step 1 : Base Coat
I started applying Mechanicus Standard Grey with a Large Base brush from Citadel. While painting this one, be sure to thin the paint a little bit with water and very careful of the amount of paint on the brush or you might get some "pools" of paint here and there making the even surface not so even. I also painted over most of the model, just make the other detail stick out a bit as black does not cast shadow to make all those details stick out.
 |
| Mechanicus Standard Grey and a Large Base Brush. |
I used a large and medium drybrush from Citadel to add Dawnstone to all the rockcrete (concrete) to lighten it up a bit and then drybrushed Administratum Grey over the edges. I also applied Agrax Earthshade (mixed with little Lahmian Medium) in the recesses to give it some brown looking shadows to make it look more natural and compliment the final steps. A highlighting brush from The Army Painter or Small Layer from Citadel will do the trick.
 |
| Dawnstone, two drybushes and a smaller brush. |
 |
| Administratum and two drybrushes. |
 |
| Agrax Earthshade and brushing for application. |
Step 3 : Gold and Gunmetal.
I used the Basecoat and Highlight brushes from the Army Painter when applying Balthasar Gold, though I will admit Screaming Bell or Warplock Bronze might have been better given that I changed my plan for adding bronze / copper colour. With that out of the way, I picked out all the rivets, bolts and other parts as shown in the pictures.
 |
| Balthasar Gold and a base coat brush. |
 |
| Agrax Earthshade and brushes for application. |
You can add another careful application of Agrax Earthshade and call this part done, I however decided to keep working it. I used Hammered Copper from Vallejo to cover all the places I prevously painted with Balthasar Gold with Small Layer from Citadel. I mixed Hammered Copper with some Lahmian Medium to get a smoother finish, picked a section to paint two coats or three to get a even coat. For the bunker I just picked a side and for the trench I split it in several sections to work on. I also painted over everything that I wanted to be a red light with Hammered Copper and then Bright Bronze as an undercoat for Spiritstone Red (that will be added in step 6).
I then used Bright Bronze to highlight with and painted all the rivits, bolts and nuts that had rockcrete beneath them while using Small Layer from Citadel or Kalinski Masterclass from The Army Painter. I used two coats of Reikland Fleshshade after I highlighted with Bright Bronze to change the shade a bit, I found it a bit too bright.
 |
| Hammered Cooper, Bright Bronze and two brushes for application. |
 |
| Agrax Earthshade and a Highlighting brush used for applying it. |


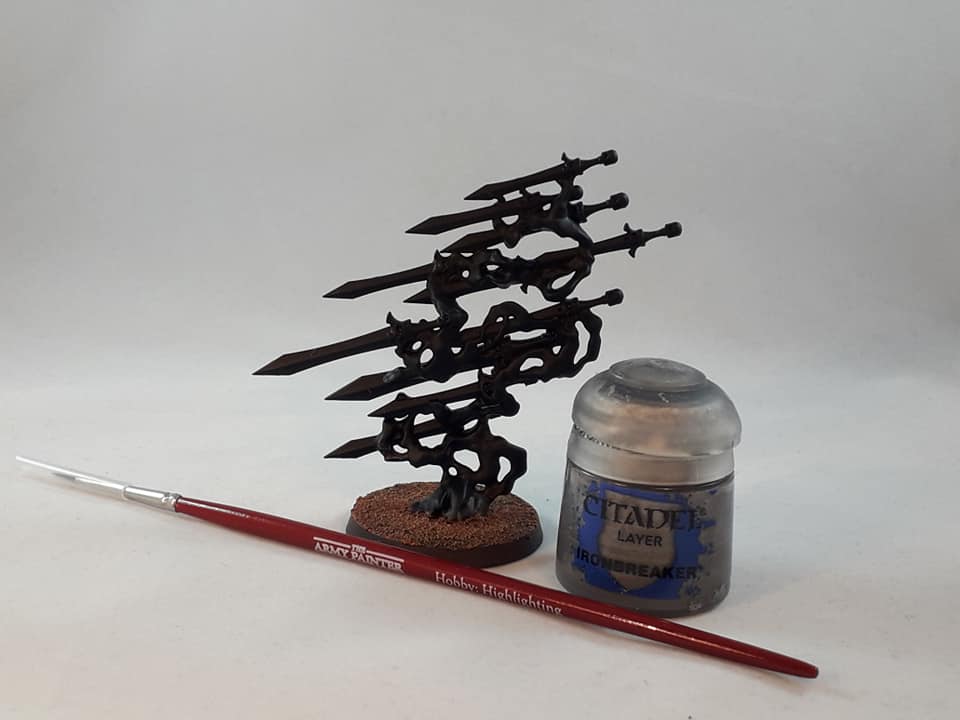
I picked up a medium base brush from Citadel and some Ironbreaker, covered the floors of the trenches and roof of the bunker with the colour. I just applied a single coat because it will be covered with items to make it look worn and not to look like that the Adeptus Mechanicus just made it 10 minuites ago.


I applied a generous coats of Nuln Oli with a medium base brush from Citadel and Basecoat from the Army Painter just to make it look a bit dirty. I also re-applied Nuln Oil on areas that I thought could use a little more black gunk. I skipped highlighting the gunmetal areas as I will be using some pigments to weather them later on and any highlight will be lost under it.
As a final touch I added Stormhost Silver and Hammered Copper on the rivets and bolts. Just use Stormhost on the rivets and bolts that have the copper colour beneath them and vice versa for the Hammer Copper colour.


Step 4 : Skulls and Skeletons ( leather is included as well).
I picked out all skulls, skeletons and leather with Charred Brown, after than was done I applied Beasty Brown to all the areas over with Charred Brown. I just highlighted the leather with Parasite Brown.
For the skeletons I mixed Beasty Brown and Leather Brown until I was happy with the gradient. Then I mixed Leather Brown with Bonewhite for the raised areas of the bones.I just kept adding the lighter colour to the darker colour to make a gradient. After all that was done I added a wash of Soft Tone from The Army Painter to tone everything down a bit, a second wash is not a bad idea if you want the darken it further as I did.


Step 5 : Armour, Crates, Ammo boxes and weapons.
I painted two coats of Castellan Green on all the armour, crates, ammo boxes and weapons I could find then washed over them with Coelia Greenshade to make it look like they have been there for a while. For the Aquila symbols on prevously mentioned objects I used Ceramite White, followed by Screaming Skull to create some contrast with the green. It it possible to darken it with Agrax Earthshade or Nuln Oil (about something will stay white for long on the battlefield), I went for Nuln Oil as the Coelia Greenshade has a similar oily finish


Step 6 : All the Little Things.
For the three books around I used three coats Rakarth Flesh, a highlight of Pallid Witch Flesh, mixed Lahmian Medium with Argrax Earthshade to have a finish a bit smoother, you can also add 'ard coat or satin varnish after coating with a varnish to give it some sheen.I tell myself they have a selection of servitors armed with rags to clean it during a lull in the fighting as the reason the books are clean. I also painted the book marks with Khorne Red, highlighted it with Wazdakka Red and washed over it with Agrax Earthshade mixed with Lahmian Medium. Keen observers might note I applied Agrax Earthshade over the entire book and mark in one go.


For the buttons on the control panel of the bunker I went for yellow, blue, green, red and Spiritstone Red for lights on the doors. There are some other lights and buttons around the bunker, I used the same colours there.


Step 7 : Battle Damage and Weathering.
First is to mention safety, I'll recommend using a mask and a pair of latex / nitrile gloves as not to have your nose full of this stuff or if you are like me with an allergy to pigments. Troucers and shirts, along with a newspaper to protect your working surface is also recommended,
 |
| Gloves and mask. |
 |
| Pigments from Forge World. |
8. Completed copy from the Standard Template Construct factorum.


This piece is quite bit, a bunker, two trenches and the three joints witch I glued together. This is a lot of work to paint like I did but Warhammer TV has a quick and dirty version for those that want this table ready quickly.
Remember that experience is the only thing that can not be taught.